Showing posts with label Decor. Show all posts

Wednesday, May 15, 2013

Christmas Card Display


I am sad to admit that 2012 was the first year in YEARS that we did not send out a Christmas card. 

The intention was there but they just. didn't. happen.

My pregnancy nausea kicked in right around Thanksgiving and I went downhill from there.  I was sick.  I was tired.  And I just didn't care.  We stayed home for Christmas {which was wonderful} and we kept it simple and relaxed.  We put up a tree and hung stockings and I put together this little craft for hanging Christmas cards. 

While I didn't send one, I loved getting them all season long.  I love checking the mail during December.  And I love displaying all of the cards I get.  So, here's what I did.

I wanted to hang the cards with clothes pins but even glittered ones stilled looked ugly on the sides to me.  So, I started out dying the clothes pins.  I figured if vinegar and food coloring worked for eggs it would work for clothes pins.  And it did.  I didn't keep track of the ratio I used but I put a LOT of drops of food coloring in enough vinegar to cover the pins.


After the clothes pins dried I brushed one side with Mod Podge then sprinkled on glitter.  The porch made for a great place to glitter so it wasn't all over my house.


I strung some satin ribbon on a wall with clear 3M Command Mini Hooks.


As Christmas cards arrived in the mail, I placed them up on the wall with a clothes pin.  By the end of the month only the photo cards and handmade cards remained as I ran out of room.  I'll have to hang more ribbon next year!

Pin It!

Monday, August 20, 2012

Handprints


I posted about the begining of our handprint project back in 2009. 

Starting at the age of one, I've painted my kid's hands and done their handprint on a little canvas.  I just use acrylic paint.  Now that they are three and five, I have eight to hang. 

The bonus is that my mom sent me a package full of my artwork and school work from when I was young.  In the pile I found my handprint from when I was four!  I cut it out and mounted it on a canvas to include in our collection.  How great is that?  I'm so glad she saved it!

Here is our collection:


Here is my cute little hand:


Pin It!

Friday, August 17, 2012

70th Birthday Gift


My dad turned 70 this year. 


A few weeks before his birthday I emailed all of the family and asked people to email me something they love about him. 

I thought of putting them together in a book but knew it would end up sitting on the shelf. 

My husband came up with the idea for a collage.  So, I created a document that said, "70 Reasons Why We Love Bruce" with little talk bubbles.  I got almost double the responses but included at least one from each person then printed the total list for him. 

I printed the document 12 X 16, matted it, framed it and shipped it off.


I wasn't able to be there for his party but I was told there was laughter and tears as he read through each one. 

It was a great reminder, as I saw all of the responses coming in, of how wonderful a man he is and just how much he gives to others.  I hope he treasures it.
 
I know many of you have asked for the template and I sent it out to a few.  But, my hard drive has since crashed and I no longer have the file.  I'm sorry I can no longer share it.


Pin It!

Sunday, October 16, 2011

Ruler Growth Chart


My parents moved out of their house of twenty-nine years this summer.  And they left their growth chart on the wall.  Painted over.  Never to be seen again.*  So sad.  I was measured on that wall at four years old and many times more into adulthood.  My siblings, nieces, nephews, and even a few neighborhood friends were on that wall.  So many memories.  Seeing that I knew I had to make a growth chart that I could take with me when I move.  I've wanted to make a movable growth chart for four years and just now got around to actually executing it.  I've seen cute ones all over online and found the ruler like ones on Pinterest so copied  one of those.  You can see the one I copied from 517 Creations here.

I purchased a pine board that was 1 x 6 x 6.  I stained it (well, my dad did a coat as well since he was hanging around) with a few coats of Minwax.  I like the stain & polyurethane combo for projects like this - it makes for one easy step.  I measured every inch and drew the lines with a paint pen.  I drew the lines one inch long and every fourth line two inches long.  I printed off a font of numbers I liked, traced them on and colored them in with paint pen as well.  I started, like she did, with the first number six inches up and hung it with the bottom of the board six inches from the floor so that "1" hit 12 inches from the floor.  I wanted it to measure more than six feet since I have some tall brothers...you never know!  Lastly, my dad sprayed it with another couple layers of clear polyurethane to protect that paint. 

I took the kids' measurements I've been saving up and wrote my sons in one color sharpie and my daughters in another.  I added my husband and I and hung it on the wall with 3M picture hangers.  I wanted it pretty flush with the wall so didn't want it hanging on a nail or screw.   Now I've got a chart that can move with us through the years and we can watch how the kiddos grow. 
*To my mom's credit, she did copy over all of the measurements onto a long strip of paper to take with her.


Pin It!

Tuesday, March 29, 2011

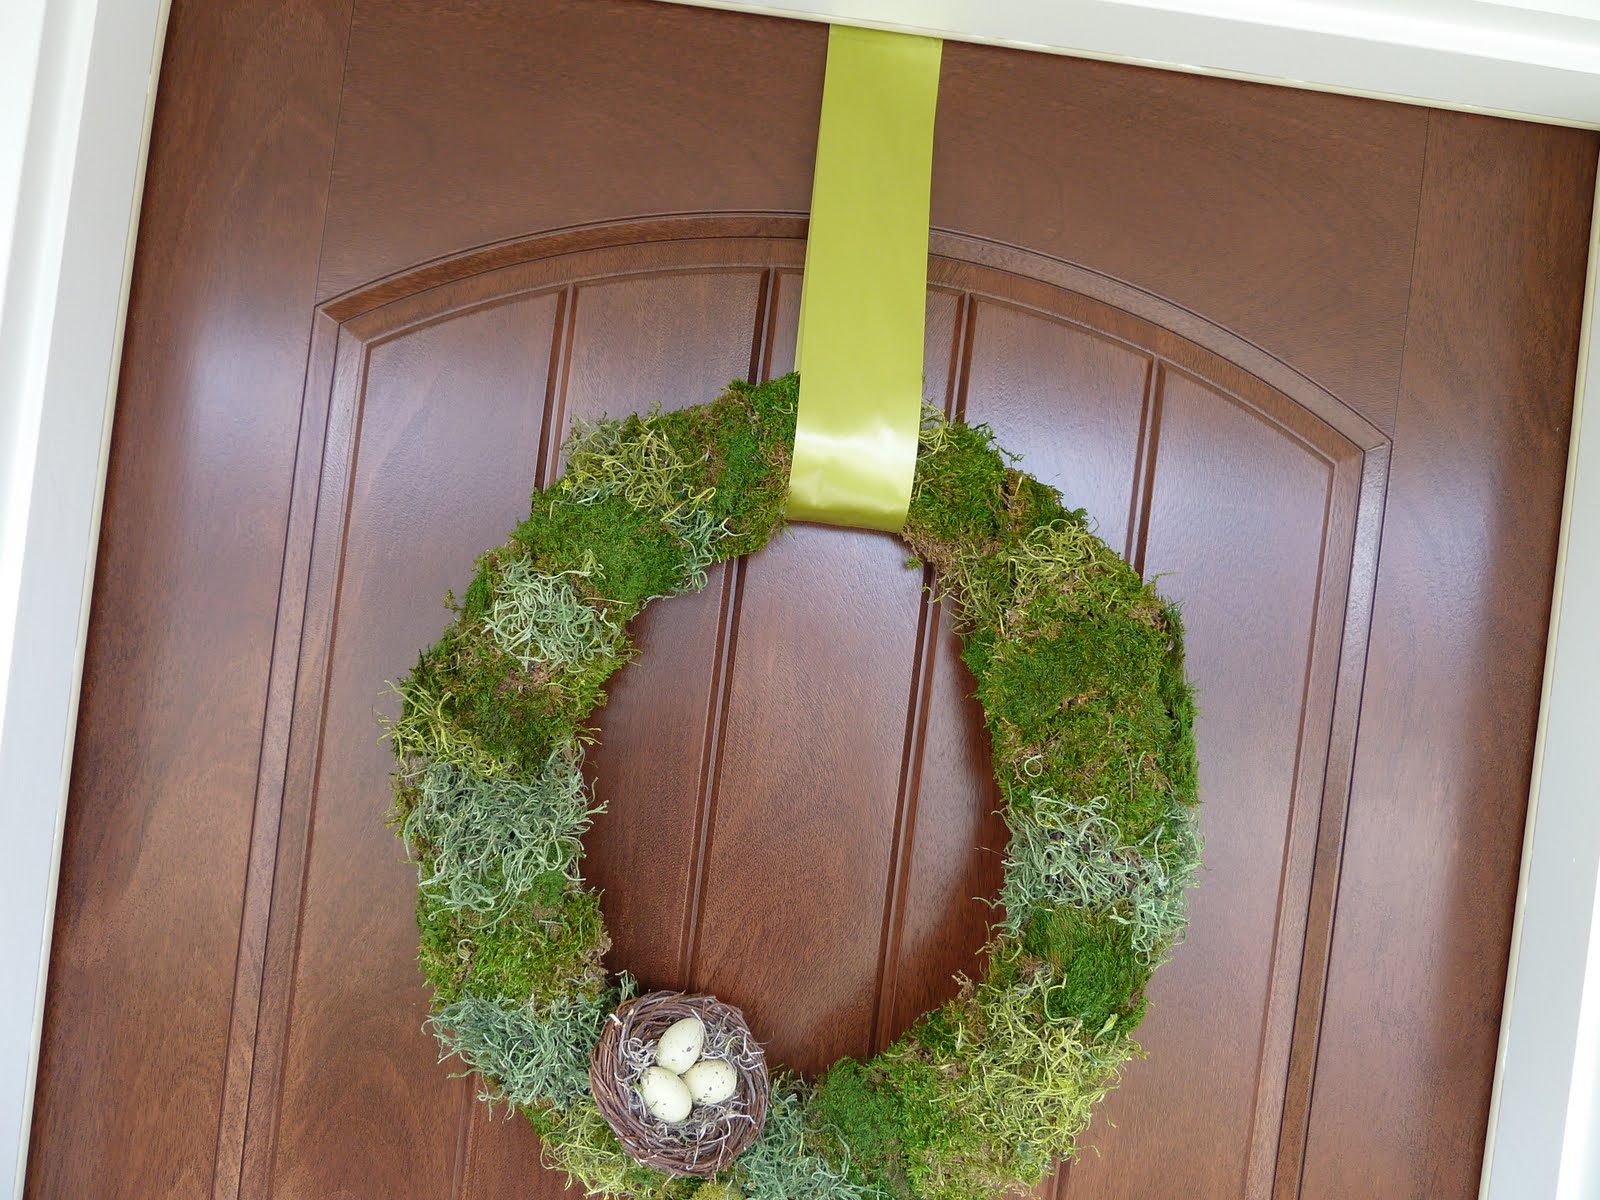
Moss Wreath


In thinking about making a green wreath for St. Patrick's Day I decided to just make a spring wreath to cover me until summer. And a green moss one just happened to look good for St. Patrick's Day and into spring so that's what I went with.

I used a grapevine wreath but if I did it again I'd go with straw or foam since mine is a little misshaped.

Step 1. Lay down a dollar store tablecloth. You'll be glad you did.
Step 2. Glue on your foam. I mixed and matched and looking at it now, I'd probably just go with one kind if I did it again. I used hot glue to adhere to the grapevine but you could certainly use something a little simpler on a foam or straw form.

Step 3. Relish in your good decision to lie down that tablecloth so you can wrap it up and throw it away. That moss is messy stuff!
Step 4. Glue on a nest and some eggs.
Step 5. Step back and enjoy your spring wreath until summer...or fall, depending on how ambitious you get.
My end result has mixed emotions from me. It looks very splotchy. I'd potentially rip it apart and start again but I don't even think I'll use the same wreath so I may just start over from scratch next year. But, this works for now.

Pin It!

Monday, January 24, 2011

Tilano Photo Tile


I had some left over transfer paper and mud from a Tilano Fresco Kit so I used a piece of wood I had, covered it with mud, stained it then transfered on a photo of my niece and her boyfriend. I used this as her Christmas gift and it only cost me the cost of a color copy at Office Depot. I love giving hand made gifts that people actually like.
 

Pin It!

Photo Monogram Letter


I found this wooden letter on clearance for $3 a few months ago and thought it'd make the perfect base for a collage of some type. In an effort to economize my Christmas gifts and make something special for my nieces, it became a Christmas gift. It already had a wall hanger on the back and being wood, I knew it would hold up nicely. It was red so I spray painted it black. Then I printed off black and white pictures of my niece growing up, including several of us together, and used mod podge to glue them on. It turned out looking better than I thought considering I used regular copy paper. She loved it.

Pin It!

Thursday, December 16, 2010

White Christmas


While there's plenty of snow outside, my favorite snowflakes are the ones hanging over our kitchen table. They are sparkly, pretty and don't make me wet or cold! I think I'll leave them up through January.

Pin It!

Thursday, February 26, 2009

Map Mural


I wanted to stick with an airplane theme for my son's new bedroom but didn't want airplane bedding (too busy for me) and didn't want blue walls with white clouds (too preschool for me.) So, we painted his room a neutral color and I painted the map of the world (minus Antarctica) on one wall. I just outlined the continents and filled them in solid as I'm in my third trimester of pregnancy and wasn't up for spending a week on the wall. I also didn't want it to look too busy. Then my husband hung vintage metal airplanes from the ceiling.I plan on going back this weekend and painting a compass rose in the corner and labeling the major oceans in a small font. It's too hard to do during the week with a two year old "helping" me out.


Pin It!

Friday, December 19, 2008

Stolen Idea


I've always liked the way Becky Higgins hangs something above her bar/counter area for each holiday...see her Christmas decor here and here and here ... and her Easter Baskets. Living in Texas, I don't have many areas over a table that don't have a ceiling fan and my dining room isn't neutral enough to do every holiday. But, I found these glitter snowflakes that tie in nicely at Target (4 for $1.00!) and bought three colors. I hung them with nylon string and love the look of them hanging from my chandelier (no ceiling fan in my dining room.) They weren't interested in all facing the camera but you get the idea.

Pin It!

Friday, August 15, 2008

Tilano Photo Tiles


I bought two Fresco Tile Kits from Tilano about a year ago and just got around to putting them together. The kit came with mud, glaze, 2 blocks of particle board and transfer medium. I made up the blocks to look like a tile, transfered the pictures and now have four "tiles" for my living room. I like them but I think I need a few more to fill in the space. I painted/glazed the sides dark but they have examples on their site of using the clay on the edge of the tile as well. My very creative friend edited the pictures for me. Thanks again!

You can see the kit I used, other kits for coasters, tiles, magnets, and examples here.

Pin It!

Monday, October 8, 2007

Tree Mural


My brother and sis-in-law wanted a tree on their nursery wall and asked me to paint it for them. Here's the finished project. It was my first time painting on a textured wall and it went well. I took a little longer than expected (with a week off for being sick) but it's done and I think they are pleased. When they decide on names I'll add the initials "carved" into the trunk. I used a latex paint from Sherwin Williams. I just went and asked them to mix up their pint sized samples for me.


Pin It!